January 13

Have You Noticed?

I have been sharing suggestions of specific items that families or classes can search for and examine when they hike. In this post, I will focus on bark, the protective outer covering of a tree.

Many of us can distinguish trees by their leaves, seeds, or fruits, but in the winter, many naturalists will use a tree’s bark for identification. Children explore the world via their senses and in this activity, they are identifying texture and learning the accompanying vocabulary. Furthermore, recognizing patterns and developing comparison skills are foundational math concepts.

The following photos are only a sampling of tree bark I saw on my last hike. Aren’t the patterns diverse? Click here to watch a video that will help you identify a tree using its bark.

After touching and describing the bark you find on trees, make a tree bark rubbing. There are several ways to do this, but I prefer black paper and white chalk. Hold the paper very still or tape it on the tree until the rubbing is completed. I found pushing hard in one direction made the best rubbing. Compare the bark patterns on several trees.

Category: Art, Science | LEAVE A COMMENT
January 1

You’re Going to Want to Make These!

I’ve always loved paper engineering! These paper 3D snowflakes or stars are so simple to make and look beautiful and professional! Hang them at home or in your classroom. They make great party decorations. All you need is glue, scissors, paper lunch bags, and twine, fishing line, or ribbon to hang them.

Directions:
Glue nine paper lunch bags together. Brown paper bags create a different look. What happens if you use less or more bags? In the video below, she used only seven.

Place glue across the bottom of the bag and a strip up the middle to the top to create an upside-down T. Be sure to glue the bags in the same manner. Don’t turn any of the bags over and match the corners of the bags carefully. Press between each bag to secure your glue. I have used Elmers’s glue and glue sticks. Allow the glue time to dry before cutting.

To make smaller snowflakes, trim off the top.

Begin cutting shapes in your glued bags. Cutting through so many layers can be challenging, so children may need assistance, or you can cut through several layers at a time. My favorite scissors are Fiskars.

After you finish cutting, take hold of the two inside bags and pull around to create a large circle. Attach the two ends together. I found double-sided tape works well or you can use the suggestion in the video below.  Make another because it’s hard to make just one!

Click here for video directions.

December 7

An Ornament to Treasure

My daughter, a Covid bride, was married this year and we both wanted to save the lovely flowers from her wedding in June and her reception in November. I experimented with drying the flowers in my basement. When I saw these DIY ornaments at Michaels. I knew they would provide the perfect means to display some of the blooms. I’m excited about gifting her this keepsake ornament! What an easy way to preserve memories from a dance, anniversary or any other special occasion. Do you have any other ideas on how to use these flowers? Please leave your suggestions in the comments.

Note:  Suspending flowers upside down in a dry, cool place helps to maintain their form while they are going through the drying process. It also allows the air to circulate around the petals, stems and leaves, preventing mold.

November 25

Land Art Movement

According to Kim Dinan, “Studies show that the average American child spends only four to seven minutes a day in unstructured play outdoors, and seven hours a day in front of a screen.” Yet, there is abundance of research that concludes that outdoor play is critical to a child’s health and development.

Andy Goldsworthy is a renown artist and photographer who creates art from natural objects found on location. He is part of the land art movement.

Using materials that you find on the ground create a work of art. Click here to use this video for inspiration. Amazing!

I left a work of art for others to find. This is a perfect time of year to create land art because of the number of leaves, nuts, and seeds that have fallen to the ground. What a fun family project, as well as a virtual assignment! If you create one, share a photo in the comments.


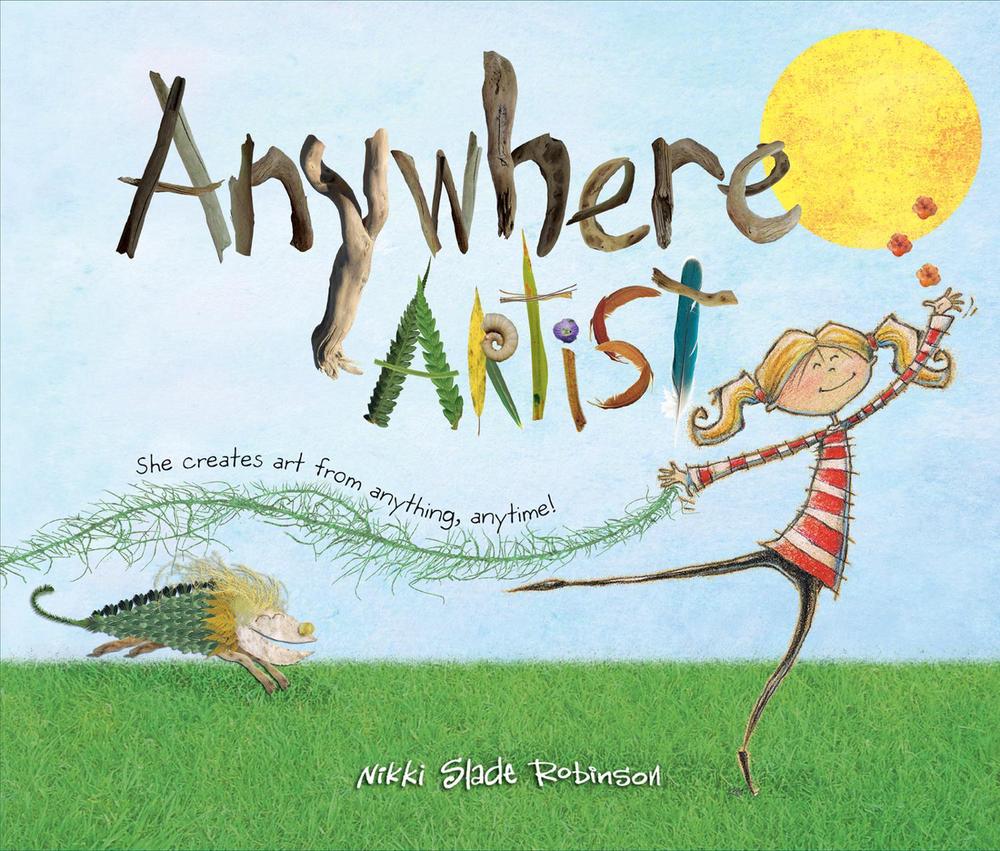
This project reminded me of the children’s book, Anywhere Artist. Click here for the Safeshare link.

See the source image

Category: Art, Science | LEAVE A COMMENT
November 22

Sticks!

I am reposting this entry with some new ideas to connect writing, reading, art, science, and math.

Go for a hike and collect sticks. When you return, lay them out and begin to compare and describe them. Think of ways to classify your found objects into groups by length, width, or texture. Are some curved, while others are straight? Do you see lichen on any of the sticks. Write the sorting words on cards and place them next to your groups. Are some sticks equal in length? Choose one stick and then place the sticks that are shorter than that stick on one side and longer on the other. Order the sticks by length. Create shapes with the sticks. Below you will see a trapezoid and a parallelogram. Form letters or words. Is there a way to make a round shape or letter? Outdoor classrooms are the best!

After reading, Not a Stick, take turns dramatizing what a stick might become or do this activity to introduce the story. Divergent thinking is hard work!  Who is speaking to the pig? The character is never shown. Safeshare Link for the video below:

Safeshare link for the video below:

Give each student a piece of paper with a stick already glued on it. What will that stick become?

November 22

Fall Trees with a Twist

This is a traditional fall art project that fosters the development of fine motor skills, the ability to make refined movements using the small muscles in hands and wrists. These skills are foundational for writing, as well as for many self-help tasks. In the following photos, you will see different options for this project for home or school. I demonstrate the technique, but I never show students a finished product, so that they will use their imaginations.

Don’t miss the connection with science! Before you begin, take a walk and observe the growth of deciduous trees which are trees that lose their leaves each fall. Notice how the branches are reaching toward the sky and how they are thicker near the trunk and thinner near the end of the branches. Observe how smaller twigs grow out of larger branches. Are the twigs and branches straight or curved? Compare the overall shapes of the trees. Touch the bark. Is the texture the same on every tree? Use the terms trunk, branch, limb, twig, and bark. Notice and compare the colors of fall leaves.

Begin with tearing a trunk from a sheet of brown construction paper. This is more difficult than cutting because of the need for self-control and the use of both hands. You will probably witness some frustration. Glue the trunk on the background paper. Then begin to tear branches and add them to the trunk. Your artist(s) could add smaller twigs and bark texture with a Crayola maker.

There are three ways to add the fall foliage: torn paper, tissue paper, or sponge paint in fall colors. You can also combine these materials which makes your tree 3D. I used one tree below to demonstrate all three choices.

Torn paper: Tear small pieces of paper and glue them on the branches. Use glue sticks or place a dot of glue (dot, dot, not a lot) on the branch and place the torn leaf on top.

Paint: Cut sponges into strips. Dip the end of the sponge into the paint and explain how to dab the sponges (using an up and down motion) to create the appearance of leaves. This requires self-control.

Tissue Paper: Cut tissue paper into squares. Place the eraser end of a pencil in the middle of the square and wrap the tissue around the eraser. Hold the tissue in place, dip it into glue, and place it onto a branch.


Example of all three techniques:

Of course, students can add a ground covering, animals, or objects in the sky to complete their masterpieces. Remember, it’s the process, not the product!

A tree is always lifting its arms in praise!

Category: Art, Science | LEAVE A COMMENT
November 16

A New Project

I look for ways to combine art with science, and I have been anxious to try this project inspired by my friend, Ellen. I collected brown leaves and pressed them for a week, so that they would be dry and flat. I placed the leaves between packing paper (parchment paper or coffee filters) and placed heavy books on top. I used fine point white paint pens to create the designs. Won’t these gingerbread leaves look lovely around my Thanksgiving table?

You could also design place cards with this project.

November 14

DIY Thanksgiving Cards or Gifts

One of my favorite fall art projects is to print leaves. It’s a simple activity and the result is beautiful! I have used printed leaves to make cards, place mats, gift bags, and wall hangings. I’ve printed on tiles without glaze and on fabric, like muslin. I used acrylic paint below, but match the paint to your project. This project provides an excellent opportunity to study leaves-shapes, veins, edges, and petioles (how the leaf is attached to the branch).

Directions:  Paint the back side of the leaf evenly. The veins are more prominent on this side. Place the leaf on a clean piece of paper and lay the project paper over the leaf, press gently, and slowly rub over the leaf with your fingers. Be careful that the leaf does not move. I usually hold it still by pressing on the petiole with one hand. You can also try an ink pad for this project. Experiment with white paint on black paper for a different look.

Wouldn’t a grandparent love to receive a home-made card with a sweet message inside?

Younger children tend to be more successful with one larger leaf.

Category: Art, Science | LEAVE A COMMENT
October 21

Previous Post Extension

I especially enjoy connecting science with art. In my previous post, I made a bouquet of fall leaves. Afterwards, I was inspired to collect foliage and create seasonal bouquets. This activity would be fun to do with your family or students. As you collect items, look at the plant parts. Fall is an opportune time to look at seeds, especially in grasses. I only had white chalk, but use colored chalk to design a variety of vases to display your collection. Discuss color and composition. Take photos of your arrangements and create cards or transfer the arrangement to a jar or vase to display inside or outside.

You can’t use up creativity. The more you use, the more you have. Maya Angelou


Category: Art, Science | LEAVE A COMMENT
October 9

Mushrooms-“fun”gi!

After all the rain, I discovered a variety of mushrooms or toadstools, during my morning walk. They seem to appear overnight. Why? What do you know about mushrooms? Although they have some characteristics of plants and animals, they don’t belong to either group. Be a mycologist and learn more about these decomposers in the video below.

Click here for the Safeshare link for the following video.

Mushrooms are usually not studied in elementary school, but they would make for an interesting multidisciplinary study. Look for mushrooms with your children when you go grocery shopping and add this healthy fungus to favorite dishes, such as pasta, omelets, and pizza. Hunt for them on a nature walk, but remind your young scientists never to eat wild mushrooms. Click here to order organic mushrooms to grow at home.

Mushrooms are fun and simple to draw. Students will enjoy designing their own mushrooms and adding small animals or insects in their compositions.